February 20, 2025
Full Momentum Episode 37: All Things Gates
Gates play a crucial role in hydraulic modeling, impacting water flow, flood control, and dam operations.
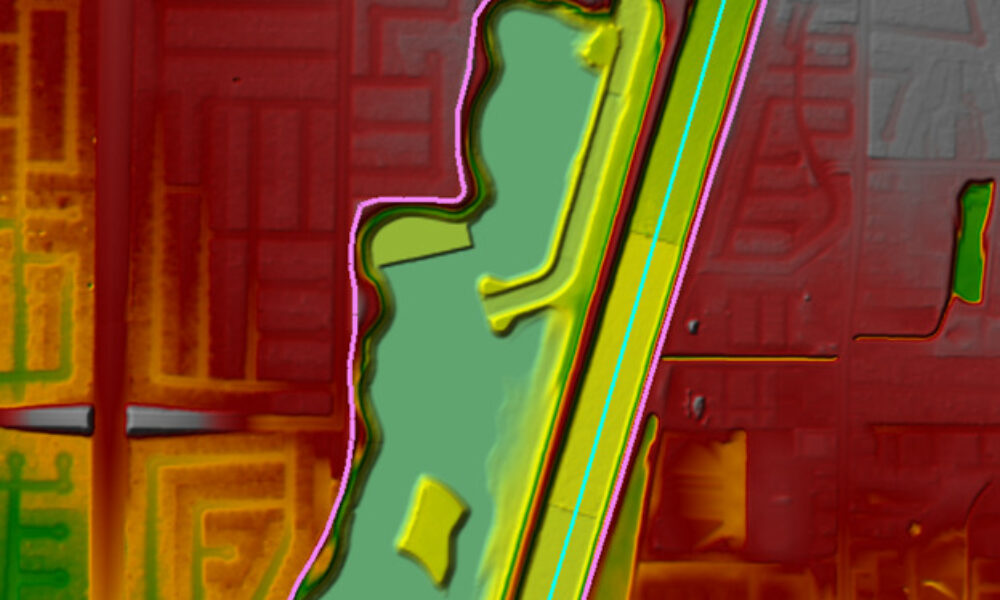
Your computational mesh is what will allow you to do 2D modeling in HEC-RAS. Think of a mesh as a net that you drape over your terrain. The continuous properties of the “infinite” terrain are then discretized onto the mesh so that computations can be made over a finite domain. Here in the geometry editor, we can see the computational mesh “draped” over the terrain. Notice that the mesh remains within the perimeter of the terrain. This is required for HEC-RAS. RAS is able to work with structured or unstructured meshes with cells that have up to eight sides. Typically you’ll begin with a Cartesian or rectilinear structured mesh and where you add more detail and resolution, you’ll have unstructured (irregular) zones within your mesh. Boundary cells will also exhibit unstructured characteristics where RAS works to fit the mesh to the mesh perimeter.

Before building your mesh, it can be useful to include a background image of your terrain so that you can make sure you draw your grid within the bounds of your terrain. The background image will also give you a clue about areas in your 2D grid that might need more or less detail. The background image has to be created external to HEC-RAS and must be accompanied by a world file. More information about world files can be found here: http://webhelp.esri.com/arcims/9.2/general/topics/author_world_files.htm

Use the 2D Flow Area button at the top of the geometry schematic to draw a new 2D area. This is drawn exactly the same way storage areas are drawn. Single click the points to define a polygon shape, staying within the bounds of the terrain (very important), and to complete the area, double click.

Once a 2D area has been defined, click on the 2D Flow Area editor button to set up the mesh. The first windows provides the user options for Manning’s n value for the 2D Area. Only 1 n value can be used for now in the 5.0 beta version of HEC-RAS for a 2D Area, but future versions will allow multiple n value definition for a single 2D Flow area. The tolerance input boxes allows the user to have some control on how much data goes into each of the cells on the soon-to-be-created 2D grid. The defaults usually work very well for the tolerance inputs. Typically you’ll enter the Manning’s n value and then click the “Generate Computation points on regular interval. Then go ahead and define the grid cell size (both width, DX, and height, DY). The starting offset point is optional. Default is to leave it at 0,0. Then click “Generate Points in 2D Flow Area, and HEC-RAS will build a structured mesh of constant cell size (this can be adjusted later).

Here we can see the mesh that was created with 500 ft X 500 ft spacing. Notice that the majority of the mesh was created with 500-ft by 500-ft square cells, but around the perimeter of the 2D area, RAS automatically creates irregularly shaped cells to fit the edges. These should always be checked after the mesh is created to make sure the edge cells are suitable. Look for cells with multiple centers, or cells that are not generally the same size and aspect ratio as the others (like the example highlighted above).

You can fine tune your mesh (either correcting unsuitable boundary cells or adding more detail/resolution) by using the “Move”, “Add”, and “Remove” tools in the Edit menu of the Geometry Schematic. After you select Edit…Move Points/Objects, you can click and drag any of the cell center points. Once you “de-select” Move Points/Objects, HEC-RAS will redraw the grid based on the new, manual placement of centers.


In addition to moving cell centers, you can add more cell centers to your mesh where you need more detail, and remove cell centers where you need less detail. For example, in this narrow connection between two flooded areas, we want more definition to better simulate the flow through here. Manually click some points where more definition is needed. Once “Add Points” is unchecked, HEC-RAS will automatically redraw the grid. Where you move points or add more points, the mesh will look a lot less structured. 

Look closely at this last figure. We have a nice structured grid in the large floodplains to the northwest and southeast. The narrow connection between the two exhibits a very unstructured mesh with more detail. There are (at least) two things wrong with the grid. In fact, these two things will prevent RAS from running until they are resolved. Post a comment below and let me know what you think the errors are.
More information on 2D modeling in HEC-RAS can be found here: https://drive.google.com/file/d/0B_s8OLJOgOi0Nm5sdHFhSzFUYkk/edit?usp=sharing
Images in this post are from the Bald Eagle Creek Example Dam Break Study example data set. The Bald Eagle Creek Example Dam Break Study HEC-RAS model is provided courtesy of the Hydrologic Engineering Center and can be downloaded along with HEC-RAS Version 5.0 beta here: http://hecrasmodel.blogspot.com/2014/10/updated-hec-ras-version-50-beta-now.html
Comments
The comments are closed.