February 20, 2025
Full Momentum Episode 37: All Things Gates
Gates play a crucial role in hydraulic modeling, impacting water flow, flood control, and dam operations.
Let’s say you have a digital terrain model of the area you want to model with 2D HEC-RAS. ONLY 2D RAS. In other words, you want to lay out a grid, but do not want to have do to any 1D computations-all 2D. The problem is the area you want to model includes one or more rivers and streams that have no bathymetric (under water topography) data represented in the digital terrain model. This is a common problem as many sources of terrain data are collected today using LiDAR (Light Detection And Ranging). As great as LiDAR is for collecting surface data, conventional forms of LiDAR do not penetrate water.
To adequately model 2D in RAS,
you need a terrain of your entire modeled area-including the stream channels. HEC has come up with an easy way to weave in a channel terrain with your LiDAR terrain, IF you already have cross sections of the channel.
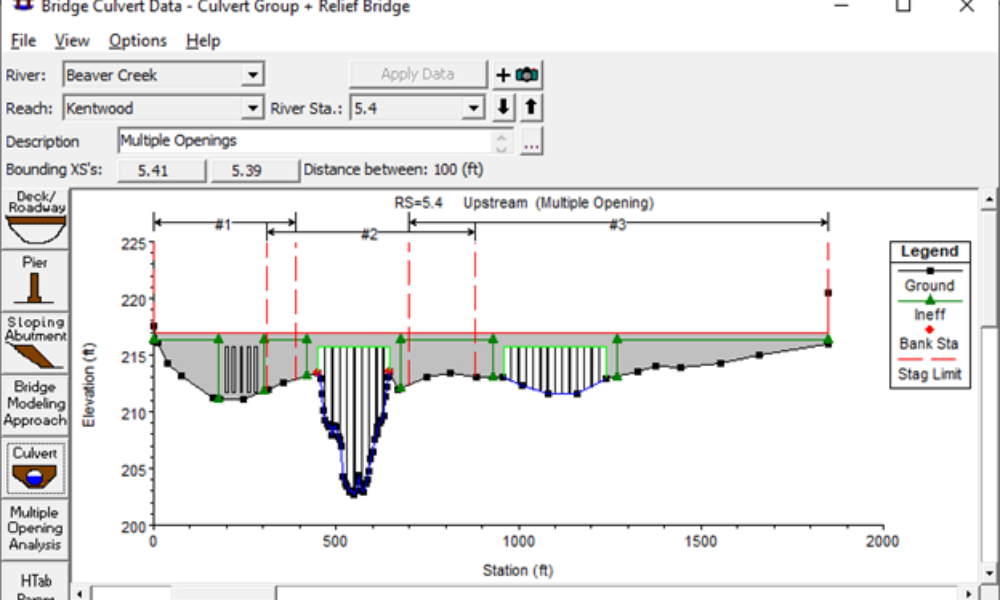
Open an HEC-RAS project in Version 5.0 (beta or newer) that has your cross sections represented in a geometry file. The figure below shows an existing model of the White River in Muncie, Indiana USA. This is from one of the standard 2D HEC-RAS data sets that come with HEC-RAS 5.0 beta.

We wish to lay a grid over this entire area to model it as 2D only. A major problem here is that the terrain below the water surface of the White River is not included in the Terrain that we have obtained. Notice that there is no relief represented within the stream, and in fact the bridges that cross over the White River are included in the original terrain. Bridges should not be included in the terrain-they can be added as model components in the geometry window, if it is desired to include them in your model.

HEC has provided a way to easily incorporate our cross section data into the terrain for a single comprehensive terrain model that includes bathymetry (and no bridges in the terrain!):
1. In RAS Mapper, first make sure a geographic projection is selected (Tools…Set Projection for Project…). Then select to view the geometry that has the cross sections you want to include in the terrain. Then check the features River, Bank Line, XS (XS stands for cross section), and XS Interpolation Surface. It should look like this:

Here you can see, that just by having cross sections in a geometry file, RAS has already created a conceptual interpolated surface from those cross sections. Each pair of cross sections is linearly interpolated. This is very similar to the cross section interpolation routines in the tools menu item of the geometry window. Only here, instead of adding interpolated cross sections, we’re developing a continuous surface that can be made into a terrain. RAS does all of this for you, all you have to do is enter cross sections into your geometry, and check the box that says XS Interpolation Surface.
2. From the data file tree on the left, right-click on the name of the geometry file you’re working in and select Export Layer…Create terrain GeoTiff from XS’s (channel only). We select channel only, under the presumption that the LiDAR data has better resolution than the cross section data, so where the two sources overlap (i.e. in the overbanks), we’ll stick with the LiDAR data. If channel only is selected, RAS will create the new terrain between the established Bank Lines (polylines that spatially connect the cross section bank stations).

Once you select to create the terrain from XS’s, RAS will ask you to name the new terrain (a GeoTiff) and where to store it. It will also ask you to enter in a raster cell size. This is the grid cell size that RAS will set this new terrain to. It should be representative of the resolution of the station-elevation data that make up your cross section. You can view the new terrain by selecting Tool…New Terrain.

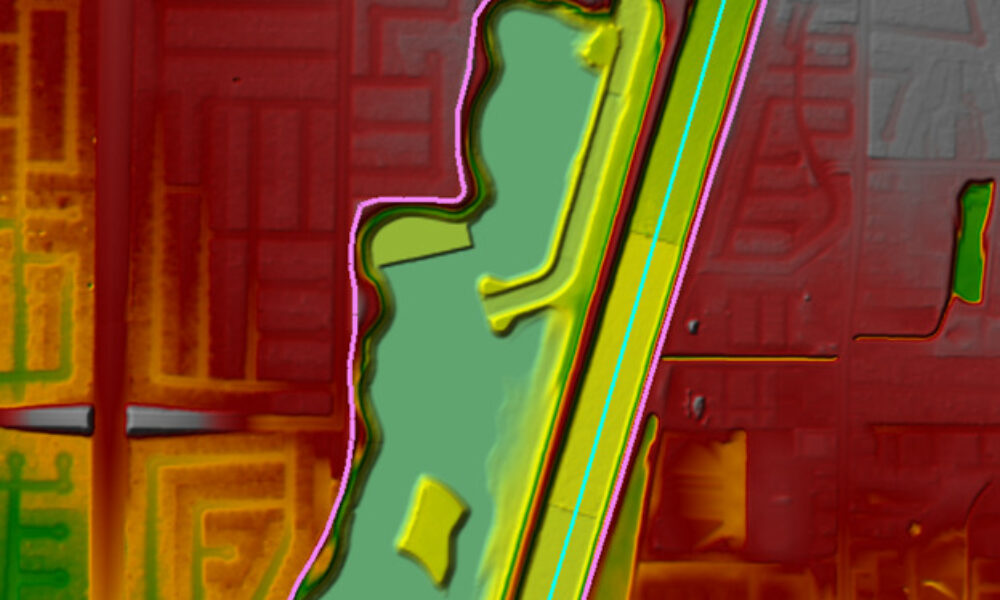
3. Once you’ve added the new channel, a new terrain can be created that combines both the original LiDAR-based terrain with the new channel terrain. Select Tools…New Terrain. This time you’ll add both two files: the original terrain and the new channel terrain.

Make sure that the channel terrain (in this example…White River.tif) has the highest priority by moving it to the top of the list using the arrow button on the left. This will ensure that where ever the two terrains overlap, the channel terrain will be used in creating the new single comprehensive terrain. After clicking the Create button, a new terrain is created that combines both the channel bathymetric data (interpolated by cross sections) and the original LiDAR-based terrain.

Now you’re ready to lay down a mesh and run your 2D model. More information on working with terrains in HEC-RAS 5.0 can be found in the document “Combined 1D and 2D Modeling with HEC-RAS”. Check the link on the side bar to download the latest version of HEC-RAS.
Comments
The comments are closed.